March 2, 2013 by akhilendra
How To Install WordPress on Xampp
If you have been wondering on how to install wordpress on xampp or on your local machine then good news is that you are neither alone nor it’s too complicated.
If you are a blogger or webmaster who use wordpress to manage your website then it is a good idea to first make changes to your site on local computer and if everything is fine, then promote them to your live production site.
Let me explain, at times you need to make some change in functionality or some design changes related to your theme. You may have to make some change at code level. In fact, if you are not comfortable playing with codes then it’s better to use plugins and premium themes so that you don’t have to do these manually. But still it is a good idea to have a copy of your site on your local computer.
Installing wordpress on xampp or on local machine using Microsoft web installer is extremely easy. I have been using xampp. Today I will walk you through the process to install wordpress on xampp.
I have posts on installing wordpress through FTP and on Shared hosting, you can refer to them if you need that information.
How To Install WordPress on Shared hosting
Install WordPress on Xampp
Xampp is a very good apache installation which makes web development very easy. It is a tool with;
- Apache server
- Php
- Databases
You can use it in a variety of ways to develop your site. But we will focus only on installing wordpress using xampp in this post.
Let’s begin with the process.
Step 1 – Install Xampp on your computer- Download Xampp and install it on your computer. You can download xampp from apachefriends.
Process of installing apache is fairly easy and exactly similar to any other software you had installed in the past. Just keep on clicking next and xampp will be installed on your machine.
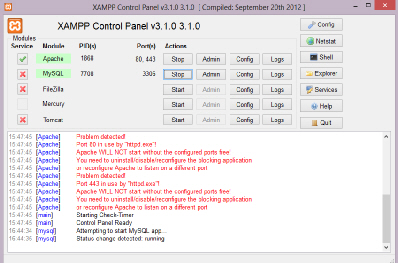
Once it is installed, you will get this screen;
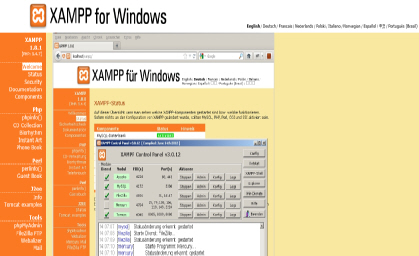
Start Apache and MySql by clicking on Start button along with them. Once it is started, you need to verify if its working fine and installation is working as expected. To verifyy if xampp is installed properly, you should enter http://localhost/xampp/ in your browser. You should get following screen;
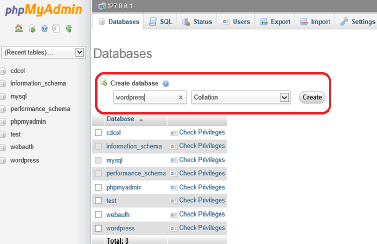
Note- you may need to create a database for your wordpress installation. In order to do that, copy and paste this URL in your browser- http://localhost/phpmyadmin/.
It will open phpmyadmin (database) admin dashboard where you can create database as shown in the image. Assign a user with password to it and note down the details.
Step 2 – now you have xampp installed on your computer and you need to install wordpress. Download the latest version of wordpress from wordpress.org.
Unzip the file and place it in the C:\xampp\htdocs
Then you need to copy and paste the following url in your browser – http://localhost/wordpress/wordpress/
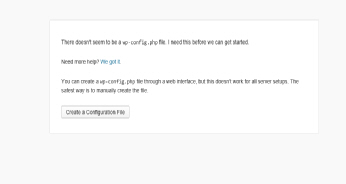
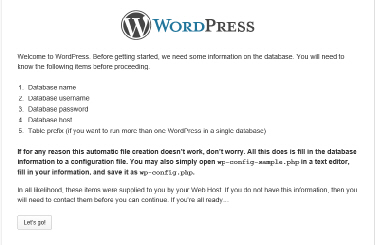
Step 3 – now you need to create configuration file from browser. It is really like filling some form rather than doing much so don’t worry. Click on “create configuration file” button (refer to the image in step 2) and you will be presented with this screen;
Click on “Let’s Go” button.
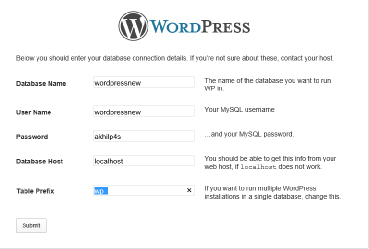
Step 4 – now in this screen, you need to enter the database details which you have created in step 1. If you haven’t created one, then you need to create a database.
Now enter your database details as shown in the image and move next by clicking on button at the bottom;
In the next screen, you will get a message “All right sparky! You’ve made it through this part of the installation. WordPress can now communicate with your database. If you are ready, time now to…” and a button “Run the install”.
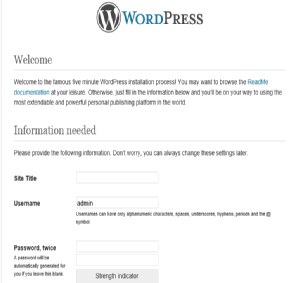
Step 5 — click on run the install button and you will be presented with the below screen in which you need to give details about your wordpress blog.
After entering all the details, click on install. You may like uncheck the button which ask you to make your site visible to search engines as your installation is on local machine.
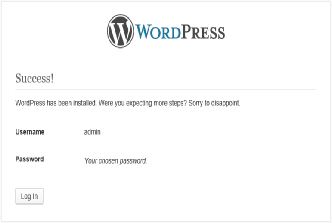
Step 6- once wordpress install is complete, you will be presented with this screen.
This screen means that your installation is complete.
Congratulations, you are done with the install of wordpress on xampp and on your local machine.
Start making changes to your blog and see how it works.
Please leave your comment and remember, sharing is caring.

otaxiri.blogspot.com">wahyu wibowo - April 21, 2013 @ 5:11 pm
Thank you for your post.Really looking forward to read more. Cool.
Really appreciate you sharing this blog post.